
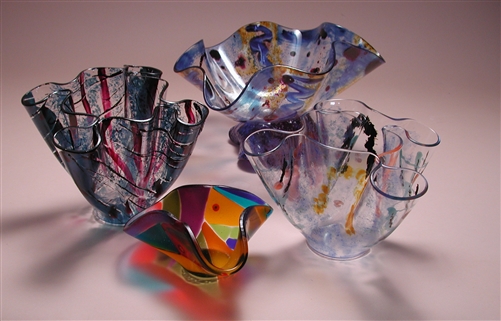
Glass slumping is a captivating art form that transforms flat glass into beautifully shaped pieces through the application of controlled heat. As with any craft, mastering the techniques involved requires both theoretical knowledge and hands-on practice. This article delves into the essential methods and skills necessary for achieving success in glass slumping, providing insights and guidance for artists seeking to advance their craft.
Understanding the Basics of Glass Slumping
Glass slumping involves heating glass in a kiln until it becomes soft enough to mold over or into a form, known as a mold. This process is distinct from glass fusing, where pieces of glass are melted together. To embark on a successful journey in glass slumping, one must first comprehend the foundational principles and equipment involved.
Essential Equipment
- Kiln: A specialized kiln with precise temperature control is crucial for glass slumping. The kiln’s size and features should match the complexity and scale of your projects.
- Molds: These are the forms over which glass is slumped. Molds can be made of various materials, including ceramic, stainless steel, and fiber.
- Glass: Choosing the right type of glass, such as compatible fusible glass, is essential to ensure successful outcomes.
- Safety Gear: Protective eyewear, gloves, and clothing are important to maintain safety while working with hot glass and kiln equipment.
Techniques for Successful Glass Slumping
Mastery of glass slumping techniques requires understanding the nuances of temperature control, timing, and mold selection. Each element plays a critical role in the final appearance of the slumped glass piece.
Temperature Control
Precise control over temperature is paramount in glass slumping. Each type of glass has a specific slumping temperature range, typically between 1100?F and 1300?F. It is essential to gradually increase and decrease the temperature to avoid thermal shock and achieve the desired shape. Discover expert strategies here for managing kiln temperatures effectively.
Timing and Firing Schedules
The timing of the firing schedule directly affects the glass’s texture and form. A slow ramp up to the slumping temperature, followed by a controlled cooling process, is often recommended. Artists should experiment with different schedules to find the optimal balance for their specific glass type and design. Find out more about this approach to firing schedules.
Mold Selection and Preparation
Choosing the right mold is critical to achieving the desired final shape. The mold’s material and design should complement the intended glass project. Preparing the mold with kiln wash or a similar release agent is necessary to prevent the glass from sticking. Explore advanced guides and tips for preparing molds effectively.
Troubleshooting Common Issues
Even seasoned artists encounter challenges in glass slumping. Understanding common problems and their solutions can help mitigate issues and improve outcomes.
- Air Bubbles: These often form due to rapid heating. Slowing the heating process can reduce bubble formation.
- Uneven Slumping: This may result from improper mold alignment or uneven heat distribution. Ensuring the kiln is level and heat is evenly distributed can prevent this issue.
- Cracking: Cracks can occur due to thermal shock. Avoiding abrupt temperature changes is essential for preventing cracking.
For detailed troubleshooting advice and solutions, learn about our tailored solutions.
Conclusion
Mastering the art of glass slumping requires dedication to understanding the intricacies of the craft. By focusing on equipment, techniques, and troubleshooting, artists can create stunning, unique glass pieces. Continuous learning and experimentation are key to refining skills and achieving success in this captivating art form. Explore advanced guides and tips to enhance your glass slumping journey.